
How to Design a Backyard from Scratch: A 5-Step Guide
Don't let a blank backyard intimidate you. We're breaking down the entire landscape design process into five simple, no-nonsense steps anyone can follow.
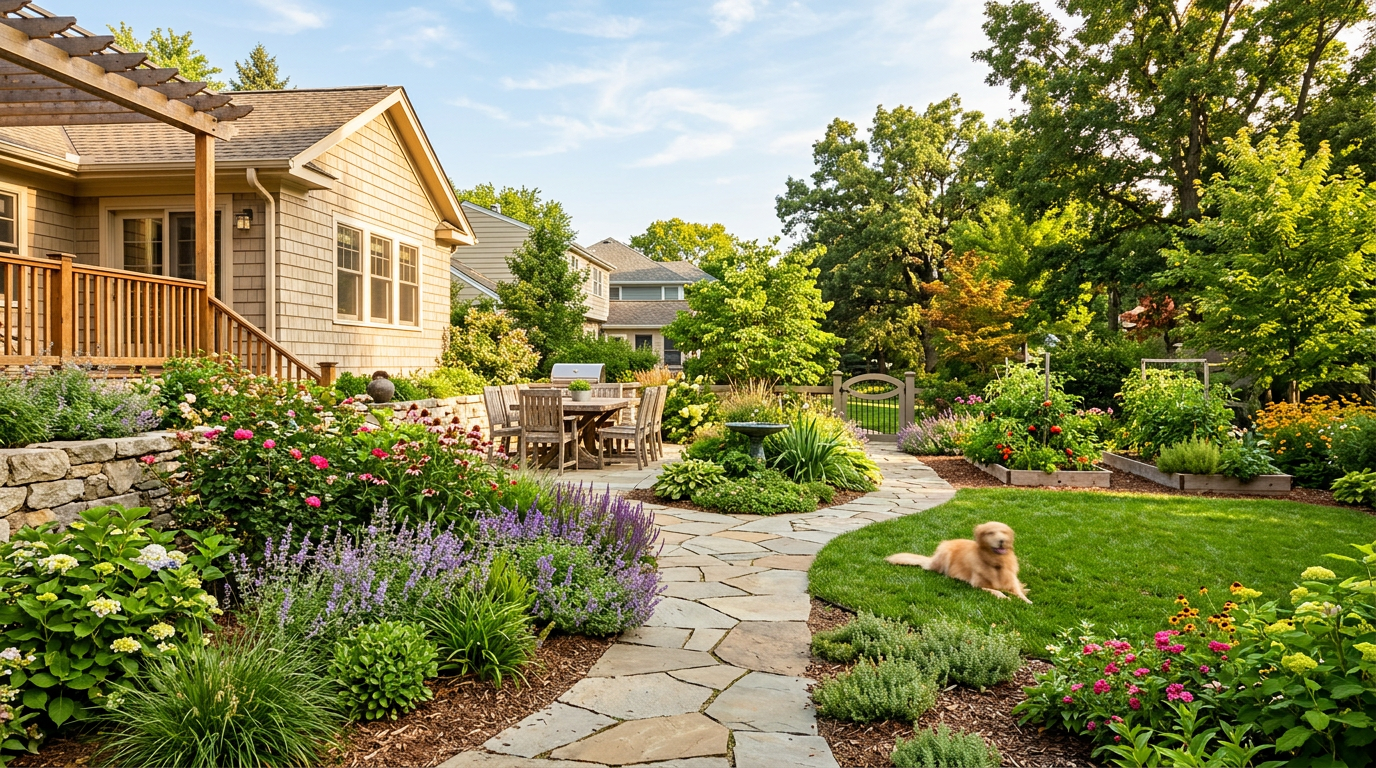
Staring at a patch of dirt and sad-looking grass can feel like looking at a blank page with a bad case of writer's block. Whether you just moved into a new construction home or finally scraped a decrepit old deck out of your yard, the 'what now?' moment is real. And intimidating.
The landscape design world loves to make this process seem mystical, full of Latin plant names and vague concepts like 'creating flow.' Forget that. We're here to tell you it's not magic. It's just a sequence of logical decisions.
Designing a backyard from scratch is about answering a series of practical questions. We're going to walk you through the exact five steps every pro uses, but without the gatekeeping and the four-figure price tag. Let's get to work.
Step 1: Define Your 'Why' (Function First, Always)
Before you pin a single 'dream backyard' image, stop and think about what you actually want to do back there. A gorgeous stone patio is useless if your family just wants a patch of grass to kick a soccer ball around. Form follows function. Always.
Grab a notebook and answer these questions honestly:
- Who will use this space? Just you and a partner? A family with chaotic toddlers? A retired couple? Do you have pets?
- What are the primary activities? Be specific. 'Hanging out' isn't an activity. 'Grilling for 6-8 people every weekend,' 'playing fetch with the dog,' 'growing tomatoes and herbs,' 'reading in a hammock on Sunday afternoons,' 'hosting bonfire nights for the neighbors'—those are activities.
- What problems are you trying to solve? Do you need privacy from a nosy neighbor? Is there a soggy spot that needs a solution? Do you have zero shade and feel like you're living on the surface of the sun?
- What's your maintenance tolerance? Be brutally honest. Do you find yard work therapeutic, or do you view a lawnmower as a medieval torture device? This will dictate everything from plant choice to lawn size. If the answer is the latter, you'll want to read up on low maintenance backyard ideas.
Once you have your list, group the activities into 'zones.' This is pro-speak for 'areas.' You might have a 'Dining Zone,' a 'Lounge Zone,' a 'Play Zone,' and a 'Utility Zone' (for trash cans, a compost bin, a shed). This list is the foundation of your entire plan.
Step 2: Measure, Map, and Bubble
Now we move from dreams to reality. You need a base map. It doesn't have to be a CAD masterpiece. We've designed killer backyards on the back of a napkin, but graph paper is better.
- Measure Everything: Grab a 100-foot tape measure (like the Komelon 6611IM for about $20). Measure the dimensions of your property. Measure the back of your house, and the location of every door and window. Locate and measure existing features you can't or don't want to move: large trees, utility boxes, septic tank lids, slopes, AC units.
- Draw Your Base Map: Transfer these measurements to paper, drawn to scale. A good scale is 1/4 inch = 1 foot. Mark north. Note where the sun hits at different times of day (morning sun in the east, hot afternoon sun in the west). Note downspout locations and any areas where water pools.
- The Bubble Diagram: This is the best part. Using your list of 'zones' from Step 1, draw rough circles or 'bubbles' on your map where you think those activities should happen. The 'Dining Zone' bubble should probably be near the kitchen door. The 'Play Zone' might be in the center, where you can see it from the house. The 'Lounge Zone' might be tucked into a corner with afternoon shade. Don't worry about shape or details. Just play with adjacencies. Does the loud 'Play Zone' need to be away from the quiet 'Lounge Zone'? Yes. This simple exercise solves 80% of all layout problems.
Step 3: Plan Your Hardscape (The Bones)
Hardscape is the non-living stuff: patios, decks, paths, retaining walls, and fences. It's the 'bones' of your landscape. It's also the most expensive, disruptive, and permanent part of the project. That's why we plan it—and usually install it—first.
Your bubble diagram tells you what you need. The 'Dining Zone' bubble becomes a patio. The 'Lounge Zone' might be a small deck or a secondary gravel patio. The lines connecting them become pathways. We learned the hard way on one of our first projects that trying to build a patio after planting a bunch of beautiful perennials is a recipe for mud, frustration, and dead plants. Don't be like us.
This is where you'll spend a good chunk of your budget. According to the National Association of Realtors' 2023 Remodeling Impact Report, a new concrete paver patio has a 69% cost recovery on resale, and homeowners who completed the project gave it a 'Joy Score' of 9.7 out of 10. People love their patios. (Source: nar.realtor)
Your main options for surfaces are:
- Pavers: Incredibly durable, classic look, tons of options. A DIY paver patio is a tough but achievable weekend project.
- Concrete: Cheaper upfront, but can crack and is harder to repair.
- Decking: Great for sloped yards or a step-down from the house. Wood requires maintenance; composite (like Trex) is expensive but lasts forever.
- Gravel/Decomposed Granite: The cheapest and most DIY-friendly option. Excellent for secondary spaces like a fire pit area or side yard path.
Figure out your primary hardscape first. If you're wondering what it'll set you back, we've broken down how much a paver patio costs in excruciating detail.
Step 4: Add the Softscape (The Living Layer)
Now that the bones are in, it's time for the fun part: plants. But this isn't a trip to the nursery to buy one of everything that looks pretty. That's how you get a chaotic, high-maintenance mess.
Your planting strategy should be layered:
- Trees & Large Shrubs (The Walls & Ceiling): These are your structural plants. They create privacy, provide shade, and define the edges of your 'outdoor rooms.' Plant these first. Think about their mature size! That tiny Arborvitae will be 15 feet tall and 4 feet wide one day. Place them where you need a screen or a focal point. An ornamental tree like a Japanese Maple can anchor a whole garden bed.
- Perennials & Grasses (The Furniture): These are the workhorses that come back every year. They provide color, texture, and seasonal interest. Group them in masses of 3, 5, or 7 for a more natural, impactful look. Mix different heights and textures. For example, pair the spiky texture of Salvia 'May Night' with the soft mounds of 'Rozanne' Geranium.
- Groundcovers & Annuals (The Decor): Groundcovers fill in the gaps, suppress weeds, and cover the 'floor.' Annuals are your temporary pops of color. Use them in pots and window boxes for a low-commitment splash.
When choosing plants, live by the 'right plant, right place' mantra. Look at your map. Is this spot full sun (6+ hours), part shade, or full shade? Is the soil sandy or clay? Check your USDA Hardiness Zone to make sure the plants you buy can survive your winter. A nursery tag has all this info. Read it.
Step 5: Furnish and Light It Up
The yard is built, the plants are in. Now you make it livable. This is the final layer that turns a 'backyard' into an 'outdoor living room.'
- Furniture: Your 'zone' plan dictates your needs. A dining table and chairs for the dining zone, a deep-seating sectional for the lounge zone, a couple of Adirondack chairs for the fire pit area. Don't skimp here. Cheap patio furniture falls apart. Brands like Outer and Yardbird are pricey but built to last. A more budget-friendly but still solid option is a set like the Hampton Bay 'Laurel Oaks' from Home Depot, which runs about $800.
- Lighting: This is the most overlooked element of landscape design. Good lighting extends the use of your yard past sunset and adds a massive dose of safety and ambiance. Don't just stick a single glaring floodlight on the corner of your house. Layer your lighting. For a pro look without a pro price, a starter kit like the Brass Path & Area Light Kit from Volt Lighting costs around $450 and will change your entire yard. Check out our guide to landscape lighting ideas that don't look cheap.
- Features & Decor: This is the personality. The fire pit, a small water feature, container gardens, outdoor rugs, string lights, a grill station. These are the elements that make the space uniquely yours.
Designing a backyard from scratch is a marathon, not a sprint. The key is the master plan you made in Step 2. With that guide, you can tackle this project in phases, over months or even years, knowing that each step is building towards a cohesive, functional, and beautiful space. Now go get that tape measure.
Frequently asked
What is the very first step in designing a backyard?+
The first step is always function. Before any drawing or shopping, determine how you want to use the space. Make a list of activities like dining, playing, or gardening. This 'why' will guide every other decision, from layout and materials to plant selection.
How can I design my backyard on a budget?+
Start with a master plan, but implement it in phases. Do the messy hardscape work yourself (like a gravel patio instead of pavers). Choose smaller, younger plants—they're cheaper and establish faster. Also, focus your spending on one key area, like a patio, to make a big impact.
What is the 70/30 rule in landscaping?+
The 70/30 rule is a design guideline suggesting that 70% of your planting area should be composed of foundational plants (trees, shrubs, perennials) and 30% should be reserved for 'showstopper' or feature plants and annuals. It helps create a balanced, not-too-busy look and ensures a solid green structure.
How do you create 'zones' in a backyard?+
Create zones by physically and visually separating areas based on their function. Use a patio or deck to define a dining/lounge zone. Use planting beds, low hedges, or changes in ground material (e.g., from grass to gravel) to create transitions. Furniture groupings and outdoor rugs also effectively define a zone.