
How to Design a Backyard From Scratch: A 5-Step Guide
Designing a backyard from scratch feels daunting, but it's not. We'll show you how to skip the expensive designers and create a space you'll actually use.
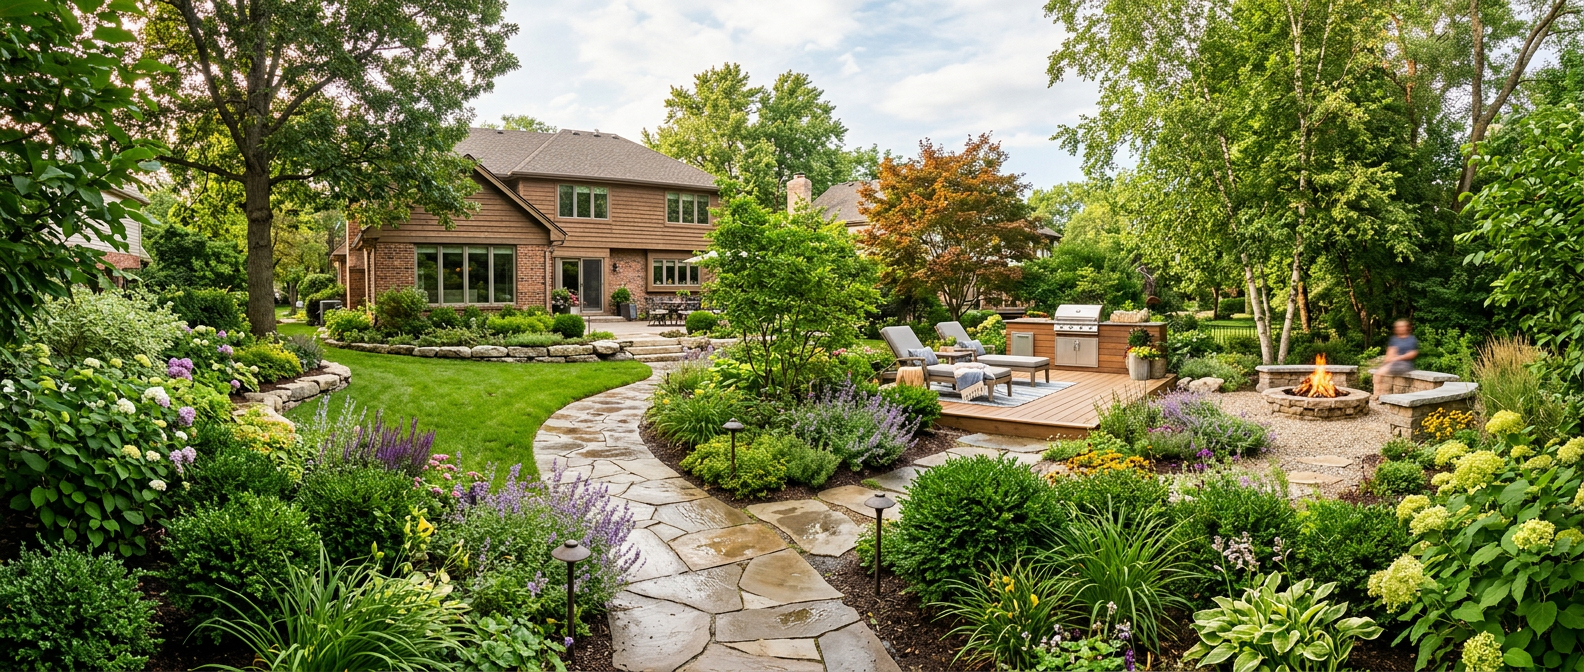
Staring at a muddy, empty patch of dirt behind your house can feel paralyzing. The internet is full of glossy photos from landscape architects that seem completely disconnected from your reality and your wallet. Forget all that. Designing a backyard from scratch is a project you can absolutely tackle yourself.
We're not going to talk about abstract concepts like "rhythm" and "balance." We're going to give you a step-by-step process that works in the real world. This is about creating a functional, beautiful space you'll love for years, without taking out a second mortgage.
Step 1: The "Sit Test" (a.k.a. Purposeful Loitering)
Before you draw a single line or buy a single plant, you need to gather data. The best data comes from just being in the space. This is the single most important step, and it's completely free.
Grab a cheap folding chair and a drink. For one week, go sit in your backyard at different times:
- Morning (8 AM): Where is the sun? Is it gentle and pleasant, or already baking a certain spot?
- Midday (1 PM): Where is the full, direct sun? Where is the only patch of shade? Is the wind whipping around a corner?
- Evening (6 PM): Where does the sun set? What spot catches that golden hour light? Is this where you'd want to have dinner?
Take notes. You'll quickly discover where you naturally want to be. The spot that's shady and cool at 1 PM is your future lounging area. The spot with the great sunset view is your fire pit location. This isn't abstract art; it's practical ergonomics. Let the yard tell you how it wants to be used.
Step 2: Define Your Zones
Now that you know how sun and shade work in your yard, you can stop thinking of it as one big space and start breaking it down into functional zones. Think of it like an open-concept floor plan inside your house—you still have a kitchen area, a dining area, and a living area. Your backyard is the same.
Common zones include:
- The Dining Zone: For a table and chairs. This is usually close to the back door for easy access to the kitchen. It needs a solid, level surface like a patio.
- The Lounging Zone: For comfy chairs, a sofa, or a fire pit. This might be further from the house, in a cozier corner you identified during your sit test.
- The Play Zone: For kids, pets, or yard games. This is often a simple, durable patch of lawn.
- The Utility Zone: The ugly-but-necessary area. This is where you hide the trash cans, the AC unit, and the compost bin, usually screened off by a fence or some tall plantings.
Sketch this out on a piece of paper. It doesn't need to be a masterpiece. A few bubbles labeled "Patio," "Lawn," and "Fire Pit" is all you need. This map gives your project structure.
Step 3: Hardscape First, Plants Second
This is a non-negotiable rule. The hardscape—patios, decks, walkways, retaining walls, and fire pits—forms the bones of your backyard. It's the permanent, structural part of the design. You build this first because it's messy, disruptive, and defines the spaces for everything else.
Trying to build a patio after you've planted your garden is a recipe for crushed plants and endless frustration. Get the heavy lifting done first.
A paver patio is the ultimate DIY-friendly hardscape project. It defines your main dining or lounging zone and provides a solid foundation. If you're feeling ambitious, you can even tackle it yourself over a weekend. We have a complete DIY Paver Patio Step by Step guide for that. For a lounging zone, nothing beats a dedicated fire pit area. It creates a natural gathering spot for evenings. Check out our guide on how to build a fire pit area for a project that delivers huge value.
Step 4: Choose Plants The Smart Way
With your hardscape in place, it's time for the fun part: plants. But this is where most DIY designs go wrong. People buy a cart full of pretty flowers at the garden center with zero planning.
Don't do that. Follow these rules for a landscape that thrives instead of just survives:
- Right Plant, Right Place: Remember your sun map from Step 1? Use it. Plants labeled "Full Sun" need 6+ hours of direct sunlight. "Part Shade" needs 3-6 hours. "Full Shade" needs less than 3. Don't fight it.
- Think Mature Size: That cute little spruce in the 3-gallon pot will be 40 feet tall and 20 feet wide in 15 years. Read the plant tag! We've made the mistake of planting a River Birch too close to a house and paid the price to have it removed a decade later. Choose plants that will fit the space when they are fully grown.
- Prioritize Structure: Start with evergreen shrubs (like Boxwoods or Yews) to provide year-round structure and screening. Then, add deciduous trees or shrubs for seasonal interest (like Hydrangeas or Dogwoods). Finally, fill in with perennial flowers and ornamental grasses (like Coneflower, Hostas, or 'Karl Foerster' Feather Reed Grass).
Focusing on plants that are native to your region and known to be hardy is the core of our low-maintenance backyard ideas. A smart plant plan saves you time, money, and heartache.
The Budget Reality Check
Let's talk money. A full backyard overhaul isn't cheap, but you can control the costs by doing the work yourself and phasing the project. According to Angi, professional landscaping for a backyard can cost anywhere from $4,000 to over $20,000, depending on the size and complexity. By tackling the design and labor yourself, you can slash that budget significantly. A DIY paver patio might cost you $500-$1,500 in materials, versus $5,000+ for a pro install.
Don't feel like you have to do it all in one season. A great strategy is to phase it:
- Year 1: Install the main patio. This gives you a usable space immediately.
- Year 2: Add the garden beds and primary structural plants.
- Year 3: Install landscape lighting and fill in with more perennials.
This approach makes the cost manageable and allows you to learn as you go. For more ways to save, explore our list of cheap backyard makeover ideas that deliver a big impact without a big bill.
Step 5: Light It Up for 24/7 Enjoyment
Your backyard shouldn't disappear when the sun goes down. Landscape lighting is the final touch that makes your space usable in the evening, adds a massive dose of ambiance, and improves safety.
This is another area where DIY has become incredibly easy and affordable. You don't need to be an electrician. Low-voltage and solar lighting systems are plug-and-play.
- Path Lights: Use these to safely illuminate walkways. A set of Hampton Bay Solar LED Path Lights from Home Depot can run you about $50 for a 6-pack.
- Uplights: Place these at the base of trees or aimed at the facade of your house for dramatic effect. A single VOLT-brand brass spotlight can cost around $40, and it will last a lifetime.
- String Lights: The fastest way to create a festive atmosphere over a patio or deck. A 48-foot strand of commercial-grade LED string lights costs about $35 on Amazon.
Good lighting makes your investment in hardscaping and plants pay off around the clock. Don't skip it. For more inspiration, check out our favorite landscape lighting ideas that look high-end.
Frequently asked
What is the first step in designing a backyard?+
The absolute first step is observation. Before buying anything, spend time in your yard at different times of day. Note where the sun hits, where the shade falls, and where you feel most comfortable. This practical data is more valuable than any initial sketch or plan.
How do you design a backyard on a budget?+
Focus on phasing. You don't have to do everything at once. Year one, install the hardscape like a patio. Year two, add foundational plants. Year three, install lighting. This spreads the cost out, making the project manageable. Prioritizing DIY labor is the single biggest money-saver.
What are the key elements of backyard design?+
The key elements are function, form, and flow. Define your functional zones (dining, relaxing), create form with hardscaping and plants, and ensure there's a natural flow between them with clear pathways. Good lighting and low-maintenance plantings are also crucial for long-term enjoyment.
Should I hire a landscape designer?+
For complex projects with major grading or structural work, a designer can be worth it. But for most homeowners, a DIY approach is very achievable. By following a clear process—zones, hardscape, plants, lighting—you can design a beautiful and functional space yourself and save thousands of dollars.