
How to Build a Fire Pit Area: Your Complete Guide
Stop dreaming about s'mores and start building. We'll show you how to create the perfect fire pit area—no special skills or secret handshakes required.
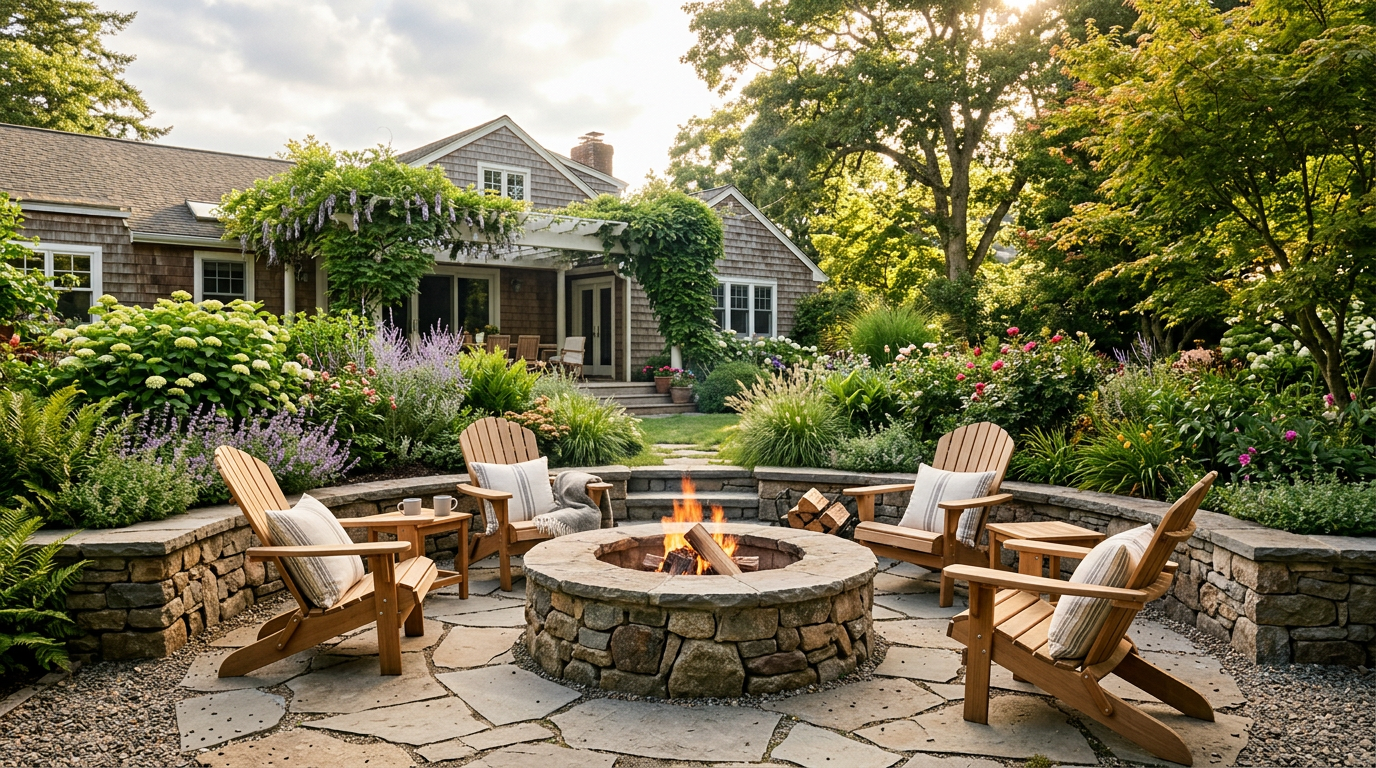
There's a primal magic to sitting around a fire. It's the perfect centerpiece for late-night talks, marshmallow roasting, and just generally feeling like you've got your life together. But a lot of guides on how to build a fire pit area make it sound like you need an engineering degree and a visit from a mystical stonemason.
That's nonsense. Building a functional, great-looking, and safe fire pit area is a totally achievable weekend project. We're not just talking about plunking a metal ring on the lawn; we're talking about creating a destination in your backyard. We're going to walk you through it, step-by-step, without the gatekeeping.
Step 1: Location, Safety, and Red Tape
Don't even think about buying a single block until you've sorted this out. Getting the location wrong is, at best, inconvenient and, at worst, a serious fire hazard. This is the one step where you need to be a stickler for the rules.
- Distance is Your Friend: Your fire pit needs breathing room. The general rule is to place it at least 10 feet away from your house, deck railings, and shed. We think that's cutting it close. We recommend 15-25 feet from any structure, property line, low-hanging tree branch, or anything else that could catch fire. Think about wind direction, too. Don't point it so the smoke billows directly into your neighbor's kitchen window unless you really don't like them.
- Check Local Codes: This is non-negotiable. Before you dig, get on your town or county's website, or even call the local fire department. Search for "recreational fire ordinance" or "open burning regulations." They will tell you the exact legal requirements for placement, size, and even what times you're allowed to have a fire. Some HOAs have their own draconian rules, so check those, too.
- Call 811 (Call Before You Dig): If your plan involves any digging—for an in-ground pit or even just leveling the ground—you must call 811 a few days beforehand. It's a free service. They'll come out and mark any underground utility lines (gas, water, electric). Hitting one of those is a very, very bad day.
Step 2: Choosing Your Fire Pit Style & Size
Now for the fun part. What kind of fire pit do you want?
- Wood vs. Gas: Wood gives you that classic campfire crackle, smell, and heat. It's cheaper to build but involves smoke, ash cleanup, and sourcing firewood. Gas is the king of convenience—flick a switch and you have a fire. It's clean, smokeless, and often considered safer. However, the initial cost is significantly higher, and you'll need to run a gas line or hide a propane tank.
- DIY Kit vs. Scratch Build: For most people, a DIY fire pit kit is the way to go. These kits, like the Belgard Weston Stone Fire Pit Kit (around $700), come with all the pre-cut, fire-rated blocks you need. You just stack them like big, heavy LEGOs. A scratch build using individual firebricks and mortar gives you more custom options but requires more skill.
- Size: Don't go too big or too small. A pit with an interior diameter of 36 to 44 inches is the sweet spot. It's large enough for a decent-sized fire that breathes well but small enough that people can talk to each other across it without shouting. The walls should be 12-18 inches high—low enough to feel the heat, high enough to contain stray logs.
Step 3: Building the Foundation (The Most Important Part)
A wobbly fire pit on a flammable surface is a recipe for disaster. The base needs to be level, stable, and non-combustible. You have two main options: a simple gravel base or a more permanent paver patio base.
For a simple, effective base, mark out a circle at least 24 inches wider than your pit's outer diameter. Dig out 4-6 inches of sod and soil. Fill it with a compactible gravel or paver base, tamping it down in 2-inch layers until it's perfectly level and rock-solid. You can top it with a final inch of decorative pea gravel or decomposed granite.
If you want the gold standard, you'll build it on a paver patio. This creates a larger, more stable, and cleaner area for your pit and chairs. The process is more involved, but it's the same principle: dig out, add a compacted gravel base, add a layer of leveling sand, and then lay your pavers. For a full walkthrough, check out our guide on DIY Paver Patio Step by Step. This is a bigger project but elevates the entire space from just a 'pit' to a true outdoor room.
Step 4: Assembling the Pit Itself
If you're using a kit, this is the easiest part. Dry-fit the first layer of blocks on your prepared base to make sure everything is perfect. Once you're happy, remove them, apply a bead of a landscape construction adhesive like Loctite PL 500 Landscape Block Adhesive (about $8/tube) on the bottom of each block, and set them firmly in place.
Continue stacking your layers, staggering the joints like a brick wall for strength. Use your level constantly—on every block and across the entire ring. A slight error on the first course will become a huge, ugly gap at the top.
CRITICAL NOTE: Never, ever use standard concrete blocks, river rocks, or regular bricks for the pit walls. They can hold moisture, and when heated, that moisture turns to steam and can cause the block to crack or even explode. Only use materials specifically rated for high heat, like firebrick or blocks from a designated fire pit kit.
Step 5: Designing the Seating Area
The "area" is just as important as the pit. You need to plan for comfortable, durable seating. Adirondack chairs are a classic for a reason—they're comfortable for lounging. Plan for enough chairs for your typical group size.
We've learned the hard way that you need to leave plenty of room. Position seating at least 3 feet from the edge of the pit to leave a safe, walkable path and protect your shins from the heat. If you have the space, a 7-foot radius from the center of the pit is a good rule of thumb for the seating zone. This is where thinking about your layout in advance pays off, especially if you're working with a smaller yard. Check out some of our small backyard design ideas for inspiration on maximizing your space.
Built-in seating walls are a fantastic, high-end option. They define the space permanently and provide tons of seating. You can build them using the same landscape wall blocks as your pit.
While you're thinking about the area, don't forget the statistics. According to the U.S. Consumer Product Safety Commission (CPSC), emergency rooms saw an estimated 7,100 injuries related to fire pits and outdoor heaters in 2022. (Source: https://www.cpsc.gov/Newsroom/News-Releases/2023/CPSC-Warns-of-Deadly-Dangers-with-Portable-Generators-and-Outdoor-Heaters-Following-Hurricane-Ian-Reminds-Consumers-of-Important-Safety-Steps). Most of these are preventable—caused by tripping, placing pits too close to combustibles, or poor setup. A well-designed area with clear pathways and proper clearance is your best insurance policy.
Step 6: The Finishing Touches: Lighting & Landscaping
Your fire pit area isn't just for when the fire is roaring. The right finishing touches make it a beautiful focal point day or night. A blazing fire creates harsh shadows, making it hard to see where you're walking. Adding subtle ambient light is key for safety and aesthetics.
Instead of a harsh floodlight, consider a few well-placed sources of low-voltage light. Path lights leading to the area, hardscape lights built into the seating wall, or even just some quality string lights hung overhead can create a magical glow. For more on this, see our guide to landscape lighting ideas that don't look like an airport runway.
Finally, add some container plants or fire-resistant landscaping around the perimeter (but not too close!). This can soften the hard edges of the pavers and stone. Integrating your fire pit into a larger vision is one of the best cheap backyard makeover ideas you can implement, as it provides a massive return in usability and enjoyment for a relatively low cost. Now, go get those marshmallows ready.
Frequently asked
What's the best base for a fire pit area?+
A non-combustible, level surface is critical. Compacted gravel, decomposed granite, or concrete pavers are the best choices. They provide a stable, fire-safe foundation. Avoid placing a fire pit directly on grass, which is flammable, or a wood deck, for obvious reasons.
How far should a fire pit be from a house?+
A minimum of 10 feet is often cited, but we recommend 15-25 feet from your house, shed, fences, and any overhanging trees or utility lines. This provides a safer buffer. Always check your local city and fire department codes for their specific requirements.
Can I use regular bricks for a fire pit?+
No, you should never use regular bricks, pavers, or concrete blocks. They can trap moisture and may crack or explode when heated. Always use fire-rated bricks (firebricks) or a purpose-built fire pit kit made from heat-resistant cast stone.
Is a wood or gas fire pit better?+
It depends on your preference and budget. Wood offers a classic crackle and smell but creates smoke and requires cleanup. Gas is clean-burning, convenient (instant on/off), and smokeless, but it's more expensive upfront and lacks the rustic ambiance of a real wood fire.