
Cheap Backyard Makeover Ideas That Don't Look It
Ready for a backyard that looks like a million bucks, without spending it? We’re breaking down the highest-impact, lowest-cost makeover ideas that anyone can pull off.
You Don't Need a Trust Fund for a Great Backyard
Let's be direct. You look out your back door and see a sad patch of weedy grass, a cracked concrete slab, and maybe a rusted-out grill from a decade ago. You see photos of amazing outdoor kitchens and sprawling patios and think, "Well, that's nice for them." You're convinced a respectable backyard makeover requires a second mortgage or a winning lottery ticket. We're here to tell you that's gatekeeping nonsense.
A backyard that you actually want to spend time in isn't about the budget. It's about a smart plan and a little bit of sweat equity. We've seen it all, and the most impressive transformations often come from scrappy, clever homeowners, not blank checks. This isn't about cutting corners to make something that looks cheap. This is about making strategic choices that give you the most visual impact for the least amount of cash.
Forget the TV makeover shows. We're giving you real, achievable, high-impact ideas to take your backyard from 'meh' to magnificent, and you won't need a team of designers to do it.
Kill (Part of) Your Lawn
The single biggest money and time suck in most backyards is the lawn. You water it, mow it, fertilize it, and curse its existence. The fastest way to a cheaper, more interesting backyard is to get rid of some of it. Not all of it, but enough to make a difference.
By carving out sections of your lawn, you create distinct 'zones' for activities, which is a core principle of good design. Replace that turf with something cheaper and easier.
- Mulch: A 2-cubic-foot bag of standard cedar mulch costs about $4 at any big box store. For larger areas, buying in bulk is the way to go. A cubic yard (which covers about 100 sq. ft. to a 3-inch depth) can be delivered for $40-$70. Create large, curving beds around the perimeter of your yard or a dedicated island for a future seating area. This immediately adds texture, color, and a professional look.
- Pea Gravel or River Rock: For a seating area or a clean, modern path, gravel is your best friend. A 0.5-cubic-foot bag of pea gravel is about $5. For a 10x10 foot patio area (100 sq. ft.) at a 2-inch depth, you'll need about 0.6 cubic yards. This is a fantastic, permeable surface that screams 'intentional design' and is one of our favorite low-maintenance-backyard-ideas.
Mark out your new bed lines with a garden hose to get the curves right, dig out the sod, lay down landscape fabric ($15 for a 150 sq. ft. roll), and cover it with your material of choice. You've just created a canvas for the rest of your makeover.
The Weekend Warrior DIY Hardscape
Hardscaping is the foundation of a great backyard, but it's also where budgets go to die. A professionally installed 200 sq. ft. paver patio can easily run you $4,000 or more. But you don't need to go that big to make a huge impact.
Focus on smaller, achievable hardscape projects:
-
A Simple Paver Landing: Maybe you just need a clean, 8x8 foot spot for your grill and a couple of chairs. Instead of a full-blown patio, this smaller project is totally doable. Using standard Holland pavers from Home Depot (around $0.58 each), the pavers for a 64 sq. ft. space would cost you less than $200. Add in a few bags of paver base and sand, and you're looking at a weekend project for under $300. We have a full guide on how to do it right here: DIY Paver Patio Step by Step.
-
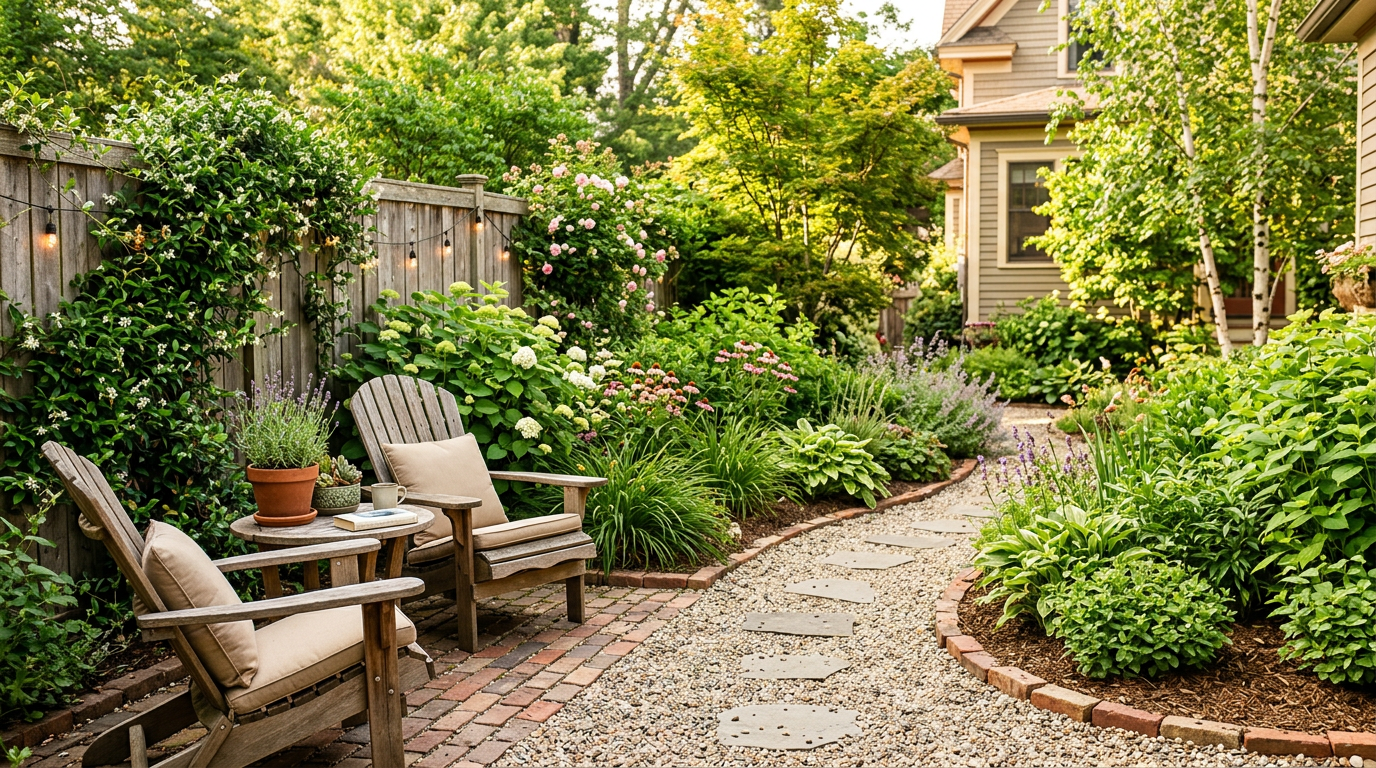
Gravel & Stepping Stone Paths: Connect your back door to your new seating area with a path. Dig a shallow trench, fill it with pea gravel, and place large, inexpensive concrete pavers (like a 24"x24" paver for about $15) every few feet. It's functional, looks fantastic, and costs a fraction of a solid walkway.
Your $150 Fire Pit Destination
Nothing says 'let's hang out' like a fire pit. But you don't need a fancy gas-powered, stone-veneered behemoth. You can create an amazing fire pit zone for less than the cost of a fancy dinner.
Here's the Dirt Cheap Genius formula:
- The Pit: Skip the expensive kits. Go to Lowe's or Home Depot and buy 30-40 concrete retaining wall blocks, like the RumbleStone Trap from Home Depot at about $3.50 a block. Stack them three courses high in a circle. Done. Total cost: ~$120. Or, for an even simpler option, buy a basic steel fire ring like the Sunnydaze Northern Galaxy Fire Pit Ring for about $70 on Amazon.
- The Base: Create a 10-12 foot diameter circle around your pit using the gravel method we mentioned earlier. This defines the space and provides a safe, non-flammable surface.
- The Seating: For now, just use camp chairs. Or, for a more permanent solution, build simple benches out of cinder blocks and 4x4 posts. Two stacks of cinder blocks with a couple of 8-foot posts laid across them makes a sturdy bench for about $40.
This single project creates a powerful focal point and a destination in your yard. For a more detailed walkthrough, check out our guide on how to build a fire pit area.
Smart Planting for Long-Term Gain
Plants bring a yard to life, but a trip to the nursery can feel like you're buying stocks, not shrubs. The key is to plant smart, not big.
A great landscape doesn't just look good; it adds real value. According to a 2018 Virginia Tech study, a home with a sophisticated landscape design had a price advantage of 5.5% to 12.7% over homes with no landscaping. Your sweat equity is a direct investment in your property value. (Source: https://vtechworks.lib.vt.edu/handle/10919/49881)
- Perennials Over Annuals: Annuals (like petunias and marigolds) give you a pop of color for one season. Perennials (like Hostas, Daylilies, Coneflowers, and Sedum) come back year after year. They're a one-time investment for years of beauty.
- Buy Small: A one-gallon perennial might cost $15-$25. The exact same plant in a smaller quart-sized pot might be $5-$8. They grow fast. In two years, you won't know the difference, but your wallet will. We do this all the time—buy a dozen small hostas for the price of three big ones and create a lush border for a fraction of the cost.
- Divide and Conquer: Know anyone with a garden? Most perennials need to be divided every few years. Offer to help them dig up and divide their overgrown hostas or daylilies in exchange for a few clumps. It's the cheapest plant you'll ever get.
- Strategic Containers: If your space is tiny, containers are your best friend. A few large pots can add color and life to a patio or deck. This is a perfect tactic for small-backyard-design-ideas.
Lighting That Doesn't Look Cheap
Bad lighting is the #1 thing that makes a backyard look cheap. A handful of those dim, blue-tinted solar stakes from the dollar store are worse than no light at all. You can do so much better for not much more money.
We've installed dozens of lighting systems, and for a DIYer, there are two clear winners:
-
Low-Voltage Landscape Kits: These are the real deal. A transformer plugs into an outdoor outlet, and you run a low-voltage wire around your garden beds. You then clip on path lights, spotlights, etc. wherever you want. A starter kit like the Hampton Bay 6-Light LED Path Light Kit costs about $70 and is infinitely better than solar. It provides warm, consistent light that makes your yard look professionally designed. Point one or two uplights at a tree or the side of your house for dramatic effect.
-
Heavy-Duty String Lights: Forget flimsy Christmas lights. Get a set of commercial-grade, weatherproof bistro string lights. A 48-foot strand like the Brightech Ambience Pro costs around $50-$60 and can transform a patio or deck. Hang them in a zig-zag pattern overhead to create a ceiling effect and an unbeatable atmosphere. It's the cheapest 'room' you'll ever add to your house.
This is one area where spending just a little more—from $20 on junk solar to $70 on a real kit—pays massive dividends. Dive deeper with our full guide to landscape lighting ideas that deliver.
Furnish and Accessorize with Scrappy Style
Patio furniture is absurdly expensive. A new 5-piece set can easily top $1,500. Don't do it. This is where your inner bargain hunter shines.
- Facebook Marketplace is Your Best Friend: People move. People upgrade. Their perfectly good (or slightly weathered) patio sets end up on Marketplace for pennies on the dollar. Be patient and pounce when you see a deal.
- The Magic of Spray Paint: That faded, chipped metal bistro set you found for $30? A few cans of Rust-Oleum 2X Ultra Cover spray paint ($8/can) will make it look brand new. Black, oil-rubbed bronze, or a bold modern color can completely change the vibe.
- Outdoor Rugs: An outdoor rug is the fastest way to define a seating area on a concrete slab or wood deck. It pulls everything together. You can find a stylish 8x10 outdoor rug from brands like nuLOOM or Safavieh for around $100-$150. It’s a game-changer.
By focusing on these high-impact areas, you can methodically build a backyard that looks incredible without draining your bank account. Pick one project—just one—to start with this weekend. You'll be amazed at the difference it makes.
Frequently asked
How can I make my backyard look good on a tight budget?+
Focus on high-impact, low-cost tasks. Clean and declutter first. Then, create defined zones using inexpensive mulch or gravel. Add a simple DIY fire pit as a focal point, install quality string lighting for ambiance, and buy smaller perennials that will grow over time.
What is the cheapest way to make a patio?+
A gravel or pea stone patio is the absolute cheapest option. Mark out the area, remove the sod, lay down landscape fabric, and cover with a few inches of gravel. It's a fraction of the cost of concrete or pavers and can be done in a weekend.
How can I add privacy to my backyard cheaply?+
Fast-growing vines like clematis on a simple wire trellis are very effective. You can also install lattice panels between existing fence posts. For a living screen, planting clumping bamboo (not the running kind!) or tall ornamental grasses like Miscanthus provides great coverage within a couple of seasons.
Are perennials really cheaper than annuals?+
Yes, in the long run. While a flat of annuals might seem cheap, you have to buy them every single year. A perennial costs more upfront but comes back year after year, often getting larger and allowing you to divide it to create more plants for free.
Is DIY landscaping worth the effort?+
Absolutely. DIY landscaping not only saves you thousands of dollars in labor costs but also adds significant value to your home. Projects like creating garden beds, building a simple path, or installing lighting are manageable for most homeowners and provide a massive return on your time investment.