
DIY Paver Patio Step by Step: A Complete Weekend Guide
Tired of that muddy patch in your yard? We'll show you how to build a professional-looking paver patio yourself in a weekend, without breaking the bank or your back (mostly).
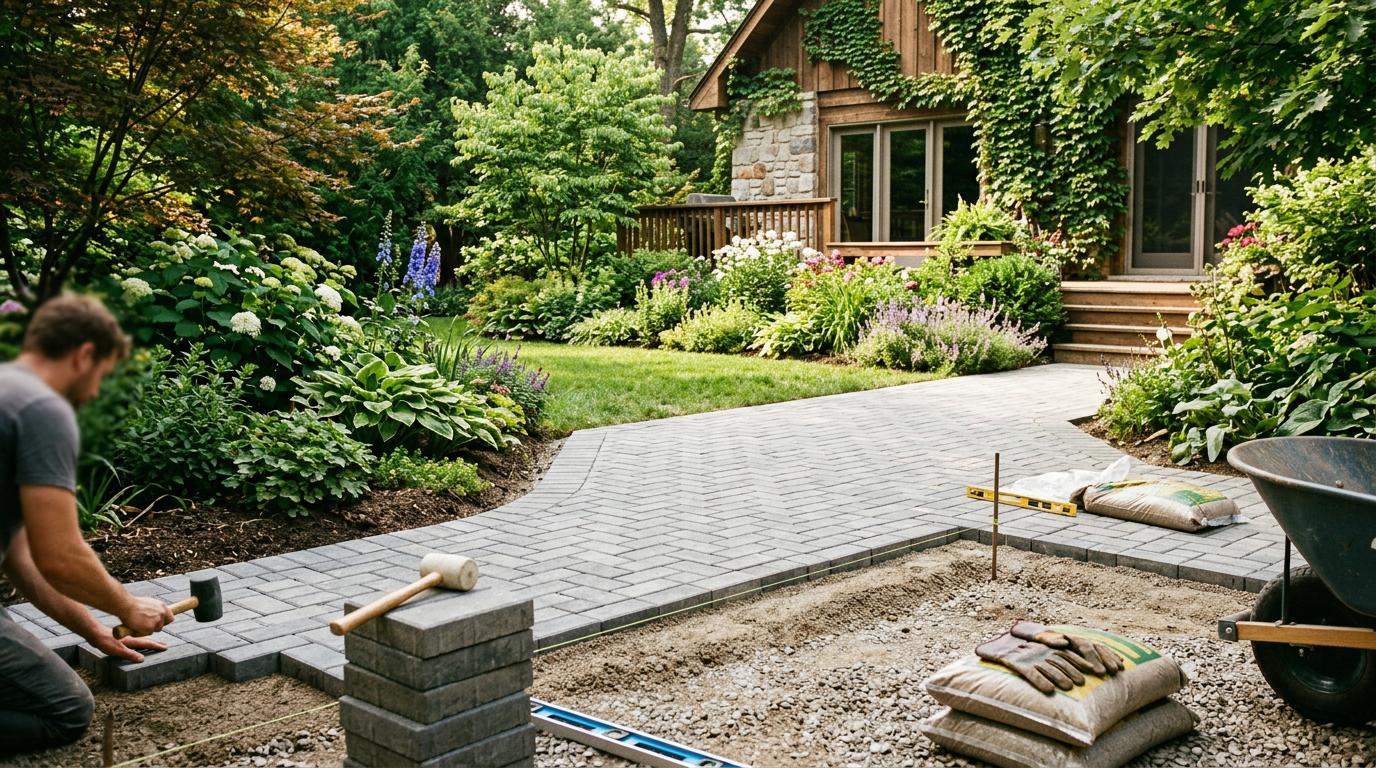
Let's be direct. That patch of mud and weeds where a lawn is supposed to be isn't doing you any favors. You need usable outdoor space. A paver patio is the answer, and despite what some landscaping companies want you to believe, you can absolutely build one yourself.
We're not going to lie and say it's easy. It's hard work. But it's simple work. Follow the steps, don't cut corners, and you'll have a durable, professional-looking patio that will last for decades. This isn't just one of those cheap backyard makeover ideas; it's a serious investment in your home's value. In fact, a new paver patio project recovers 100% of its value at resale, according to the National Association of Realtors' 2023 Remodeling Impact report (Source: https://www.nar.realtor/research-and-statistics/research-reports/remodeling-impact-report). So let's get to work.
Step 0: Plan, Design, and Get Your Stuff
Before you touch a shovel, you need a plan. Rushing this step is how projects go off the rails and over budget.
-
Location & Size: Where is this patio going? Is it a small, intimate space or a large entertaining area? Use a garden hose or spray paint to outline the shape on the ground. Live with it for a day or two. For beginners, simple squares and rectangles are your friend. Need some inspiration? Check out our guide to small backyard design ideas that don't look like an afterthought.
-
Materials: Calculate your square footage (Length x Width) to figure out how much you need. ALWAYS ORDER 10-15% EXTRA. You will make mistakes, you will have to make cuts, and having a few extra pavers for future repairs is a pro move.
- Pavers: Come in endless styles. A standard paver is 2 3/8" thick. We're fans of classic choices like the Belgard Holland Stone for its simplicity.
- Paver Base: This is the foundation. You need a 4-inch compacted layer of ¾-inch clean crushed stone (often sold as "paver base," "#57 stone," or "Class II base rock").
- Paver Sand: This is coarse, washed concrete sand, not play sand. You need a 1-inch layer for leveling.
- Edge Restraints: Plastic or metal edging that holds the whole project together. Don't skip this.
- Polymeric Sand: The magic stuff that hardens in the joints to lock everything in place and prevent weeds. We use SEK Surebond's PolySweep, but brands like Gator Maxx are great too.
-
Tools: Beg, borrow, or rent what you don't have.
- Essentials: Shovel, wheelbarrow, tape measure, 4-foot level, rubber mallet, string line, stakes, push broom, hearing protection, safety glasses.
- Rentals: The plate compactor is NON-NEGOTIABLE. Rent one from Home Depot or a local tool yard for about $100/day. You may also want to rent a masonry wet saw for clean paver cuts.
For a detailed breakdown of what this will all set you back, read our guide on how much a paver patio costs.
Step 1: Excavation - The Hardest Part
This is the grunt work. Put on some music, hydrate, and get it done.
Your goal is to dig out the entire patio area to a depth of 7 inches. Why 7 inches? Because you need room for 4 inches of compacted base, 1 inch of sand, and the 2 3/8-inch paver, leaving the final patio just slightly above grade.
Use your string lines and stakes to create a level and square outline. Check for square by measuring the diagonals—they should be equal.
Pro Tip: You also need to build in a slight slope for drainage, away from your house foundation. A good rule of thumb is a 1/4-inch drop for every 1 foot of run (or about 1 inch over 4-8 feet). Use your string line and a line level to set this grade.
Step 2: Laying the Foundation (The Real Most Important Part)
We've laid dozens of patios, and the one thing we never, ever skip is a perfectly compacted base. This is what prevents your patio from sinking, heaving, and looking like a mess in three years. A beautiful paver pattern on a crappy base is just lipstick on a pig.
- Add your ¾-inch crushed stone base material into the excavated area.
- Spread it out evenly, but only add 2 inches at a time. This is called adding it in "lifts."
- Fire up the plate compactor and run it over the entire surface 4-5 times in different directions. This is loud, it vibrates your fillings out, and it's absolutely essential.
- Add the next 2-inch lift and repeat the compaction process.
Your final base should be a rock-solid, 4-inch-thick layer that is level (with your drainage slope) and unyielding.
Step 3: Screeding Sand - The Secret to a Flat Patio
Now for the leveling sand. This 1-inch layer is what allows you to set the pavers perfectly flat. The trick is to "screed" it.
- Lay two pieces of 1-inch outer-diameter pipe (metal electrical conduit or PVC pipe works great) across your compacted base, parallel to each other.
- Dump your paver sand between and around the pipes.
- Take a straight 2x4 and, resting it on the two pipes, pull it towards you in a sawing motion. This will remove the excess sand, leaving a perfectly smooth, 1-inch-deep bed.
- Carefully remove the pipes and fill in the small trenches with sand, smoothing them with a trowel.
CRITICAL: Do NOT walk on or compact the screeded sand. Your base is for structure; the sand is only for leveling.
Step 4: Laying Pavers - The Fun Part
Finally, the payoff. This part goes fast and is incredibly satisfying.
- Start in a corner, preferably against the house, and work your way outwards.
- Lay the pavers down on the sand. Do not slide them. Just set them straight down. They should be snug against each other.
- Work from on top of the pavers you've already laid to avoid disturbing the sand bed.
- Use your level as you go to check for flatness. If a paver is too high, tap it down with a rubber mallet. If it's too low, pull it up and add a tiny bit of sand underneath.
- Pull pavers from several different pallets as you work to ensure a natural blend of colors.
Step 5: Cutting and Edging - The Professional Finish
Unless your patio is the exact dimension of whole pavers (it won't be), you'll need to make cuts along the edges.
- Wet Saw: Renting a masonry wet saw ($60-$80/day) gives you perfectly clean, professional cuts. It's messy but effective.
- Chisel: A hammer and a masonry chisel can also work. You score a line and give it a sharp whack. The break will be rougher, but it can work for certain rustic styles.
Once all your pavers are laid and cut, install your edge restraints. These are spiked directly into the paver base material, tight against the outside edge of your pavers. They are what prevent the pavers from shifting outward over time. This is another non-negotiable step.
Step 6: Sanding and Sealing - Locking It All In
You're almost there. The final step is to lock everything together with polymeric sand.
- Ensure the pavers are completely dry. Pour the sand over the patio and use a push broom to sweep it into every joint until they are full.
- Run your plate compactor over the finished pavers. USE A PAVER PAD OR A PIECE OF OLD CARPET on the bottom of the compactor to avoid scuffing your new patio. This vibrates the sand deep into the joints.
- Sweep more sand into the joints to top them off.
- Use a leaf blower on its lowest setting to blow ALL excess sand off the surface of the pavers. Any sand left on top will turn into a permanent haze when you add water.
- Using a hose nozzle set to a very fine "mist" setting, gently wet the patio. Don't blast it. You just want to activate the polymers in the sand. Follow the specific directions on the bag.
Let it cure for 24-48 hours. And that's it. You're done. You built a patio. Now you can think about adding a fire pit or some killer landscape lighting ideas to really make it pop. Maybe even start planning for that DIY fire pit area you've been dreaming of.
Frequently asked
How deep do I need to dig for a paver patio?+
For a standard pedestrian patio, excavate 7 inches deep. This allows for 4 inches of compacted paver base, 1 inch of leveling sand, and the average 2 3/8-inch height of a standard paver. For driveways that support vehicles, you'll need to dig deeper, around 12 inches.
What's the best base for a paver patio?+
The best base is 4-6 inches of compacted ¾-inch clean crushed stone (often called #57 stone or paver base). This provides excellent drainage and a stable foundation. On top of that, you'll add a 1-inch layer of coarse paver sand for leveling the pavers.
Do I really need to use a plate compactor?+
Absolutely, yes. A plate compactor is non-negotiable for both the base and the final setting of the pavers. It properly compacts the base material to prevent your patio from sinking or becoming uneven over time. A hand tamper is not an adequate substitute for this crucial step.
Can I build a paver patio directly on dirt?+
No, you cannot. Laying pavers directly on dirt or soil will result in a failed patio within a year. The ground will shift, pavers will sink unevenly, and weeds will grow through immediately. A proper 4-inch compacted gravel base is required for stability and longevity.
How long does it take to build a DIY paver patio?+
For a small to medium-sized patio (100-200 sq ft), a determined person can complete the project over a long weekend. For larger or more complex designs, plan for two weekends. The excavation and base preparation are the most time-consuming parts of the project.